Hexo+next主题优化设置
本文最后更新于:2 分钟前
前言
搭建完博客之后,感觉原有的主题太单调了,于是这几天找了很多的教程,也踩了很多的坑,因为教程上的版本和使用的版本不同,很多地方都不相同,往往一个小功能试验好多种方式,才能达到想要的效果。在这里记录下成功过的案例,方便以后查看。或许以后有朝一日,还能帮助他人
本文目录
- 在右上角或者左上角实现fork me on github
- 实现点击出现桃心效果
- 修改文章内链接文本样式
- 修改文章底部的那个带#号的标签
- 在每篇文章末尾统一添加“本文结束”标记
- 新增看板娘(能说话、能换装)
- 开启代码块复制功能及更换样式
- 打字特效
- 个性化回到顶部
- 文章末尾版权声明
- 添加图片灯箱
- 相关文章推荐
- 站点及文章字数统计
- 站点运行时间统计
- 实现简体 / 繁体一键切换
- 开启本地博客搜索功能
- 设置侧栏阅读进度百分比
- 文章置顶
- 精品文章
- 博客加入canvas粒子时钟
- 为站点添加标题崩溃特效
- 添加valine评论系统
- 用LeanClound给hexo+next博客添加文章阅读数
- 博主头像圆形并旋转
- 添加近期文章板块
- 添加博客热门文章页
- 添加文章打赏功能
一些基本的设置参考官方文档:Next官方文档
在右上角或者左上角实现fork me on github
效果图
具体实现方法
点击这里 或者 这里挑选自己喜欢的样式,并复制代码。 例如,我是复制如下代码:

然后粘贴刚才复制的代码到\themes\next\layout_layout.swig文件中,放在**
的下面,并把href改为你自己的GitHub**地址
实现点击出现桃心效果
效果图

具体实现方法
在\themes\next\source\js/src目录下新建love.js输入以下代码
1 | |
然后打开\themesnext\layout\layout.swig在末尾增加以下代码
1 | |
修改文章内链接文本样式
效果图
具体实现方法
打开\themes\next\source\css_common\components\post\post.styl在末尾添加以下CSS样式
1 | |
修改文章底部的那个带#号的标签
效果图
具体实现方法
打开\themes\next\layout_macro\post.swig搜索
1 | |
改成
1 | |
在每篇文章末尾统一添加“本文结束”标记
效果图
具体实现方法
在\themes\next\layout_macro中新建passage-end-tag.swig
并添加以下内容
1 | |
接着打开\themes\next\layout_macro\post.swig 在post-footer之前加入以下代码
1 | |

然后打开主题配置文件(主题目录下的_config.yml),在末尾添加以下代码:
1 | |
新增看板娘(能说话、能换装)
效果图
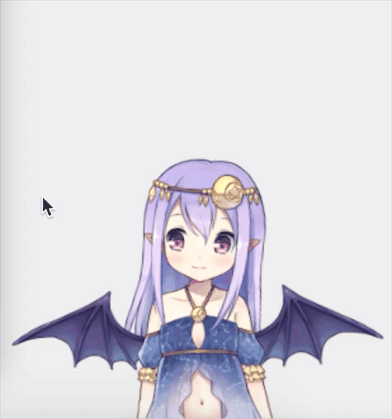
具体实现方法
1、下载 张书樵大神的项目,解压到本地博客目录的 themes/next/source 下,修改文件夹名为 live2d-widget,修改项目中的 autoload.js 文件,如下:
将
1 | |
改为
1 | |
2、打开在/themes/next/layout/_layout.swig,在head标签中加入:
1 | |
在末尾加入:
1 | |
3、在 主题配置文件 中,新增如下内容:
1 | |
4、想修改看板娘大小、位置、格式、文本内容等,可查看并修改 waifu-tips.js 、 waifu-tips.json 和 waifu.css。
开启代码块复制功能及更换样式
在主题配置文件中修改以下代码:

自己根据需要修改即可
文章末尾版权声明
效果图
具体实现方法:
在主题配置文件中开启文章底部的版权声明,版权声明默认使用 CC BY-NC-SA 4.0 许可协议,用户可以根据自身需要修改 licence 字段变更协议。
编辑 主题配置文件,修改如下配置:
1 | |
添加图片灯箱
添加灯箱功能,实现点击图片后放大聚焦图片,并支持幻灯片播放、全屏播放、缩略图、快速分享到社交媒体等,该功能由 fancyBox 提供。
在根目录下执行以下命令安装相关依赖:
1 | |
在主题配置文件中设置 fancybox: true:
1 | |
相关文章推荐
效果图
具体实现方法
在站点根目录中执行以下命令安装依赖:
1 | |
在主题配置文件中开启相关文章推荐功能:
1 | |
站点及文章字数统计
效果图

具体实现方法
在根目录下执行如下命令安装相关依赖:
1 | |
启用该功能需要同时修改站点配置文件和主题配置文件。
将如下配置项添加到站点配置文件中,这些配置项主要用于控制每项统计信息是否显示。
1 | |
主题配置文件:
1 | |
站点运行时间统计
效果图
具体实现方法
打开\themes\next\layout_partials\footer.swig,在末尾添加以下内容:
1 | |
添加站点访问量统计
效果图
具体实现方法
打开主题配置文件,修改以下配置:
1 | |
打开\themes\next\layout_partials\footer.swig,在末尾添加以下内容:
1 | |
实现简体 / 繁体一键切换
效果图
具体实现方法
1、首先,点击这里右键另存下载简繁字体切换所需的tw_cn.js文件,我们把这个文件放到 ~/themes/next/source/js 文件夹下。
修改模板,在我们想要显示简繁转换按钮的地方添加如下代码。例如,我在 NexT 主题的布局文件 ~/themes/next/layout/_partials/footer.swig 里添加了如下代码:
1 | |
读者可以在博客底部点击简体 / 繁体来看具体的切换字体效果。
开启本地博客搜索功能
效果图
具体实现方法
提升读者用户体验,博客内肯定是需要一个全局搜索按钮的。当然hexo已经集成了几款开源的搜索插件,一般都使用的是 local_search。
搜索 local_search,设置代码如下:
1 | |
注意该搜索功能需要依赖 hexo-generator-searchdb 插件,依然还是使用命令 npm install hexo-generator-searchdb --save 来进行安装。然后 在 hexo 站点根目录配置文件 _config.xml 的末尾,加入以下代码即可。
1 | |
设置侧栏阅读进度百分比
具体实现方法
编辑站点配置文件,修改 back2top 部分如下
1 | |
文章置顶
具体实现方法
在站点目录的 node_modules/hexo-generator-index/lib/generator.js 中,把改文件的代码全改成:
1 | |
然后可以在博文模板post中加个top键,值为整数,并且值为大越靠前。
在主题目录中的themes\next\layout_macro的post文件,打开查询第一个:post-meta。
1 | |
然后这个div的下一行添加上:
1 | |
精品文章
具体实现方法
在 /themes/next/layout/_macro/ 路径,找到 post.swig ,在前 文置 顶功能后边,加上如下代码:
1 | |
在 themes/next/source/css/_custom/custom.styl 中,增加如下样式:
1 | |
在需要设置精品的文章md文件中,加入如下代码:
1 | |
博客加入canvas粒子时钟
效果图
具体实现方法
它是一个可以和客户端同步的时钟,其特点是当时间走动时,数字将会散落成一个个粒子动画。
在 /themes/next/layout/_custom/ 目录下,新建 clock.swig 文件,内容如下:
1 | |
在 /themes/next/layout/_macro/sidebar.swig 中引入:
1 | |
可根据自己的偏好来设置具体位置,我是加在了侧栏的末尾。
在 /themes/next/source/js/src 目录下,新建 canvas-dance-time.js 文件,内容如下:
1 | |
为站点添加标题崩溃特效
该特效为:当用户离开站点相关的页面时,网页的标题会变成已崩溃,网站图标也会改变;当用户重新回到站点页面时才会恢复正常。
具体实现方法
在 /themes/next/source/js/src/ 目录下新建 crash_cheat.js ,代码如下:
1 | |
在 /themes/next/layout/_layout.swig 文件末尾,添加引用:
1 | |
上面的图片放在 /themes/next/source/images/ 目录下,自行选择喜欢的图片即可。
添加valine评论系统
效果图
具体实现方法
没有评论系统的博客是没有灵魂的,不仅如此,当前免费开源的评论系统中,valine 因为简洁并且支持匿名留言得到很多博主的喜爱,而像其它的来必力(韩国的)、Gitalk(Github的)等都有这样那样的缺点,不太建议使用。
需要注意的是valine后台评论保存是依赖于 leancloud的,leancloud 是一个面向个人用户免费的存储系统(当然不止是提供存储功能,还有其它服务),我们需要在 leancloud 官网注册,具体步骤可以看valine的官方文档介绍。
搜索 valine,找到如下配置:
1 | |
注意由于 valine 依赖于 leancloud 存储服务,因此要先去 https://leancloud.cn 网站注册,获取到 appid 和 appkey 后放到这里就 ok 了。其中 avatar 是设置默认头像,可以去 https://valine.js.org/avatar 选择默认头像,然后在这里设置名字即可。具体使用可以参考valine的官方文档。
用LeanClound给hexo+next博客添加文章阅读数
具体实现方法
由于已经使用了valine评论系统,只需要在进行小小的改动,就能实现此功能
登录到LeanClound,找到上次创建的应用,新建一个Class

此处的新建Class名字必须为Counter:
博主头像圆形并旋转
具体实现方法
在之前的版本里面得自定义才能达到,现在已经可以直接配置了。
打开主题配置 _config.yml 文件,搜索关键词 avatar: 修改相应配置即可。
1 | |
添加近期文章板块
效果图
具体实现方法
在 next/layout/_macro/sidebar.swig 中,加入以下代码
1 | |
在主题配置文件中加入以下代码:
1 | |
添加博客热门文章页
效果图:
具体实现方法:
博客已有的分类,如 categories 和 tags,都是基于博主的,那么有没有一种分类是基于读者的呢?有,一种是搜索,另一种就是这里的文章阅读量排行榜。前提是在主题配置文件中配置了 leancloud_visitors,配置方法在基础配置中已经介绍过了。首先新建页面:
1 | |
然后在主题配置文件中加上菜单 top 和它的 icon:
文件位置:hexo/themes/next/_config.yml
1 | |
接着在语言翻译文件中加上菜单 top:
文件位置:hexo/themes/next/languages/zh-CN.yml
1 | |
最后,编辑第一步新建页面生成的文件:
文件位置:博客根目录/source/top/index.md
1 | |
必须将里面的里面的 app_id 和 app_key 替换为你的主题配置文件中的值,必须替换里面博客的链接,1000是显示文章的数量,其它可以自己看情况更改。最后,修改样式可以在 custom.styl 中加入自定义代码。
开启文章打赏功能
一篇辛辛苦苦敲出来的文章,不妨开启一下文章打赏功能,万一真有人给你棒棒糖呢
打开主题配置文件,搜索 reward,找到如下配置并修改:
1 | |
未完待续。。。
本文作者: 仅安
本文链接: https://jinan6.vip/posts/25396/
版权声明: 本博客所有文章除特别声明外,均采用 CC BY-SA 4.0 协议 ,转载请注明出处!