部分参考借鉴于:Spring Boot实现仿博客园发送通知邮件
申请授权码
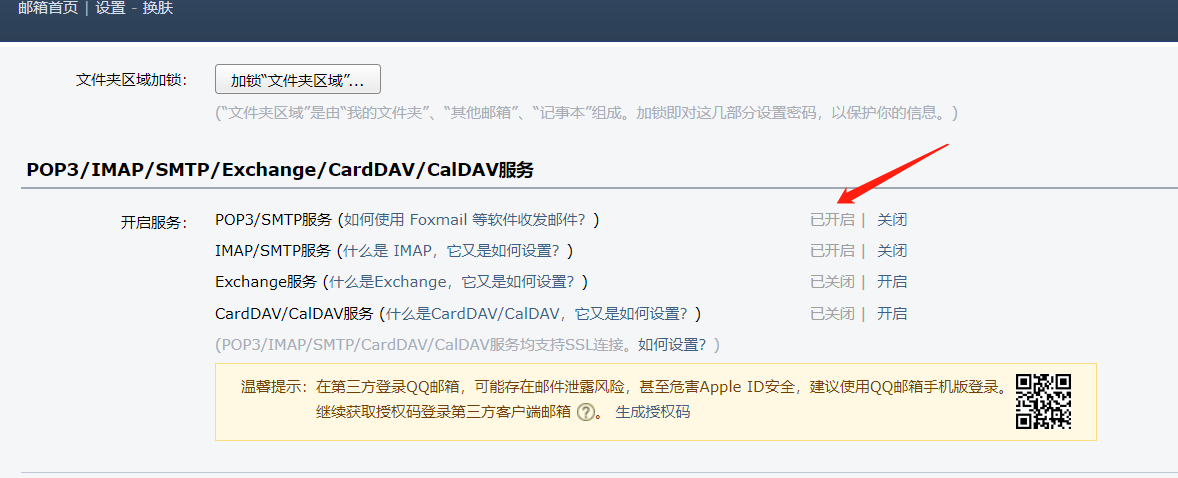
开启此选项会获得一个授权码 copy下来,接下来会用到
导入pom依赖
| <dependency>
<groupId>org.springframework.boot</groupId>
<artifactId>spring-boot-starter-mail</artifactId>
</dependency>
<dependency>
<groupId>org.springframework.boot</groupId>
<artifactId>spring-boot-starter-thymeleaf</artifactId>
</dependency>
|
配置application.yml文件
1
2
3
4
5
6
7
8
9
10
11
12
13
14
15
16
17
18
19
|
mail:
host: smtp.qq.com
port: 587
username: 自己的邮箱
password: 授权码
default-encoding: UTF-8
properties:
mail:
smtp:
auth: true
starttls:
enable: true
required: true
|
实现
参数类
定义一个类,用来接收前端给的参数
| @Data
public class MailDto implements Serializable {
@NotNull(message = "邮箱不能为空")
private String mail;
@NotNull(message = "标题不可为空")
private String title;
@NotNull(message = "内容不可为空")
private String content;
}
|
Service实现
| public interface MailService {
void send(MailDto mailDto);
void sendThymelea(MailDto mailDto);
}
|
1
2
3
4
5
6
7
8
9
10
11
12
13
14
15
16
17
18
19
20
21
22
23
24
25
26
27
28
29
30
31
32
33
34
35
36
37
38
39
40
41
42
43
44
45
46
47
48
49
50
51
52
53
54
55
56
| @Service
@Slf4j
public class MailServiceImpl implements MailService {
@Autowired
private MailSender mailSender;
@Autowired
private JavaMailSender javaMailSender;
@Value("${spring.mail.username}")
private String from;
@Override
public void send(MailDto mailDto) {
SimpleMailMessage message = new SimpleMailMessage();
message.setFrom(from);
message.setTo(mailDto.getMail());
message.setSubject(mailDto.getTitle());
message.setText(mailDto.getContent());
mailSender.send(message);
}
@Override
public void sendThymelea(MailDto mailDto) {
MimeMessage message = javaMailSender.createMimeMessage();
try {
MimeMessageHelper helper = new MimeMessageHelper(message, true);
helper.setFrom(from);
helper.setTo(mailDto.getMail());
helper.setSubject(mailDto.getTitle());
helper.setText(mailDto.getContent(), true);
javaMailSender.send(message);
log.info("发送HTML邮件成功!");
} catch (Exception e) {
log.error("发送HTML邮件时发生异常!", e);
}
}
}
|
controller
1
2
3
4
5
6
7
8
9
10
11
12
13
14
15
16
17
18
19
20
21
22
23
24
25
26
27
28
29
30
31
32
33
| @RestController
@RequestMapping("mail")
@Slf4j
public class MailController {
@Resource
private MailService mailService;
@Autowired
private TemplateEngine templateEngine;
@PostMapping("send")
public String send(@Validated @RequestBody MailDto mailDto) {
mailService.send(mailDto);
return "发送成功!";
}
@PostMapping("sendThymelea")
public String sendThymelea(@RequestBody MailDto mailDto) {
Context context = new Context();
context.setVariable("username", "测试啊");
String emailContent = templateEngine.process("emailTemplate", context);
mailDto.setContent(emailContent);
mailService.sendThymelea(mailDto);
return "发送成功";
}
}
|
由于第二种使用的是 Thymelea 模板的方式,还需要新建以下文件
在 resources下的templates目录下新建 emailTemplate.html(名字可以自定义,但是要和controller中的对应)
| String emailContent = templateEngine.process("emailTemplate", context);
|
html源代码
| <!DOCTYPE html>
<html lang="zh" xmlns:th="http://www.thymeleaf.org">
<head>
<meta charset="UTF-8"/>
<title>欢迎您加入博客园</title>
</head>
<body>
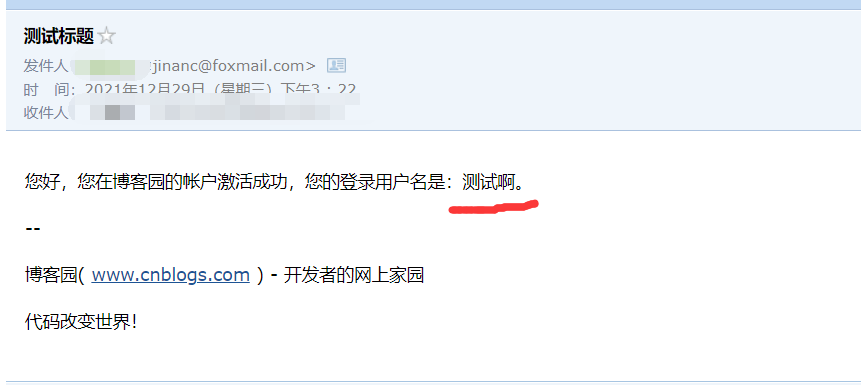
<p>您好,您在博客园的帐户激活成功,您的登录用户名是:<span th:text="${username}"></span>。</p>
<p>--</p>
<div>博客园(
<a th:href="@{https://www.cnblogs.com }">www.cnblogs.com</a>
) - 开发者的网上家园
</div>
<p>代码改变世界!</p>
</body>
</html>
|
最后在postman工具中测试即可
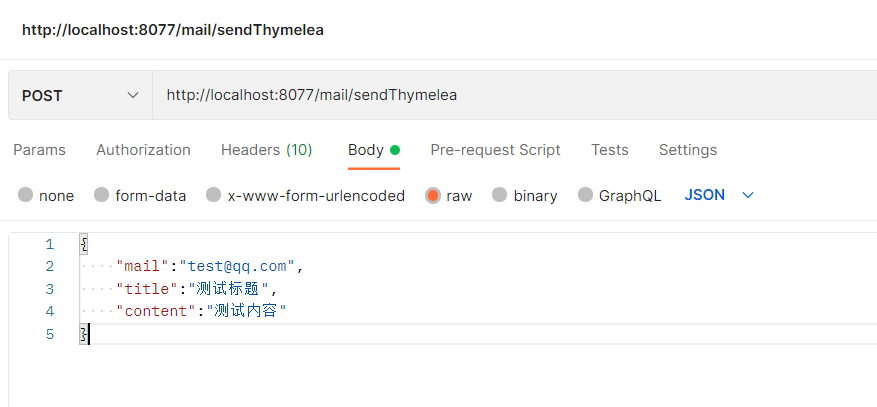
效果: